How to Organize Your Interior Design Project Binders
FREEBIE INCLUDED!
Project binders are an essential component of running a smooth interior design project. In the past, I’ve shown you exactly how I organize the business side with binders, today, we’ll dive into exactly that same system - but for projects.
Binders help us keep important information at the ready and go with us anytime we do a site visit or visit showrooms. Much of this information is also stored digitally, but for more reasons than I can count, having a good old fashioned paper version is key. Keep in mind, the binder will build and grow as the project progresses.
Binders are only created for Full-Service & E-Design Projects. For Designer-for-a-Day, client info is simply stored in a folder. A binder is not made until a project is confirmed with a contract and payment.

The Tools - Don’t skimp on cheap binders. These get a ton of use and will wear out quickly ending up in the landfill if you don’t invest in a quality product. I prefer these exact binders and these printable big-tab dividers. A ½” binder is sufficient for most projects, however, a larger project requires a 1” binder. You can download the exact binder tab templates here. You’re welcome! ;)
THE INTERIOR DESIGN PROJECT BINDER CONTENTS
Cover Page - For the front cover, we will place a print of the moodboard once that is complete, which usually takes about a week or so.

Inside Cover Page - This is a game-changer. It’s a one-sheet with quick reference details. (Hint, when you download the binder tab templates, I’ll include a template of this as well. ;) It includes information such as the family members’ names (including pet names) budget information, important dates to be mindful of, and more.
Admin - This tab includes business-related documents such as the client’s proposal, signed contract, meeting notes, calendar, and any critical emails.
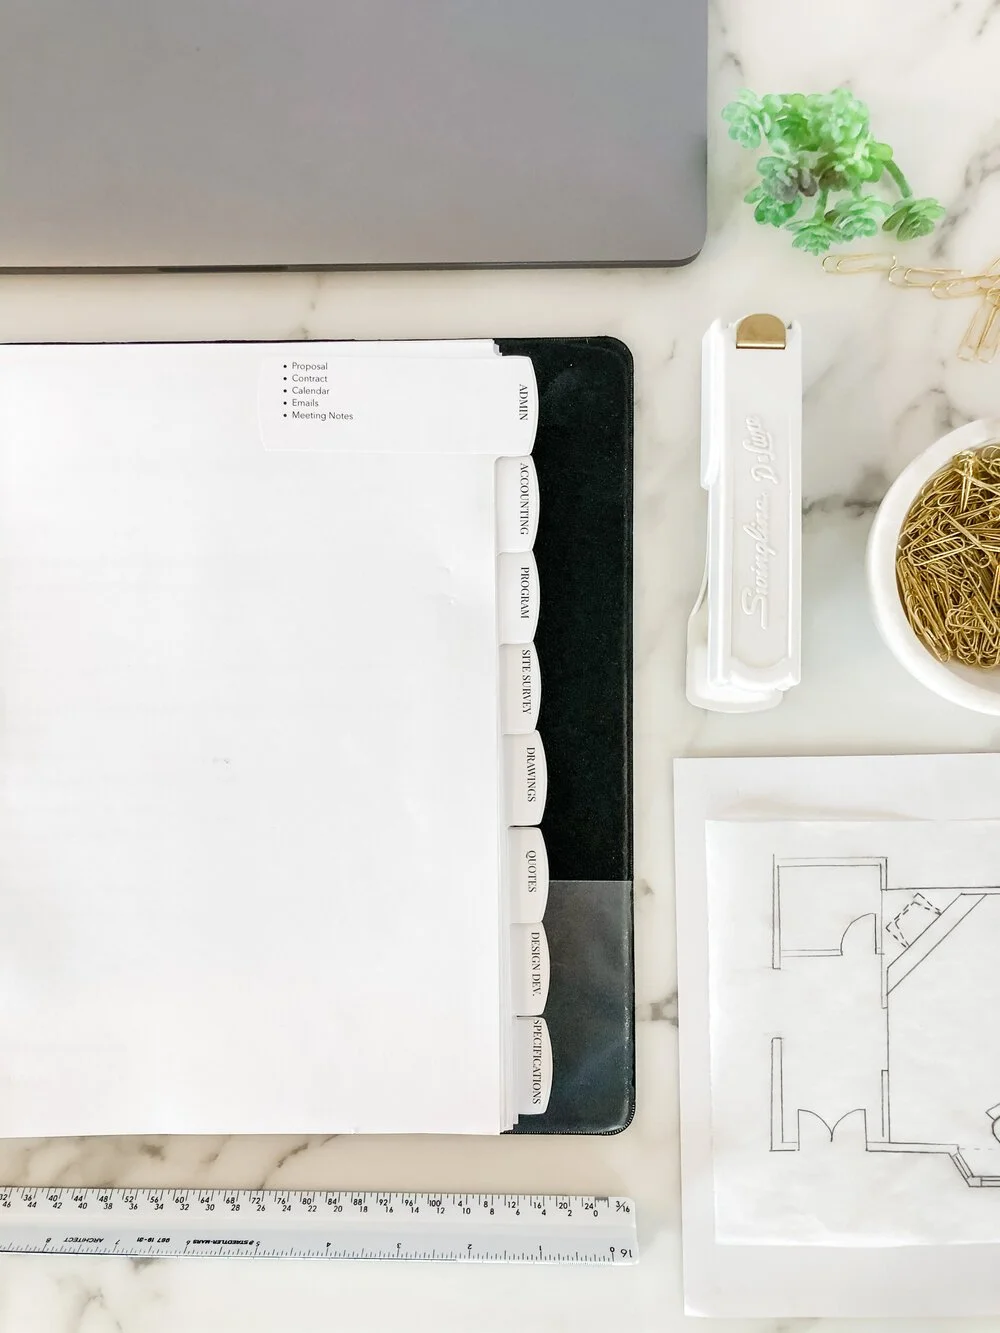
Accounting - This tab includes client invoices. We don’t put project invoices (i.e. for furniture, etc.) in the binder because there are too many, and it would simply make the binder too cumbersome.
Program - This tab includes all information related to the project program. (Hint: In interior design, the word “program” is used to describe the research done at the outset of a project. The “program” lays out the solution to the goals and needs of the client. In this tab, we keep notes from the consultation, questionnaires, and any associated worksheets we may have.
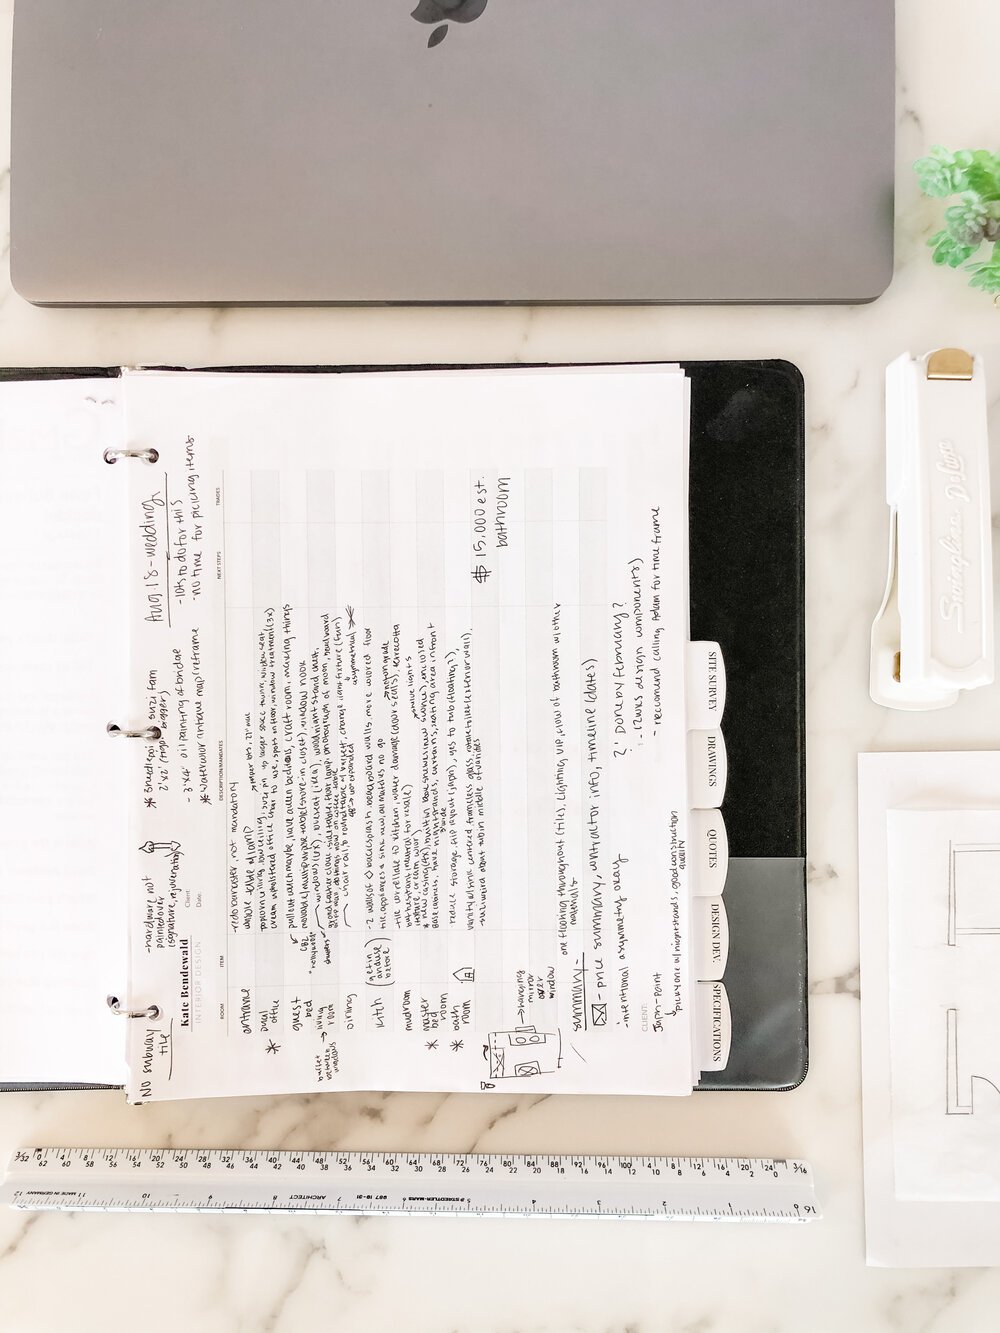
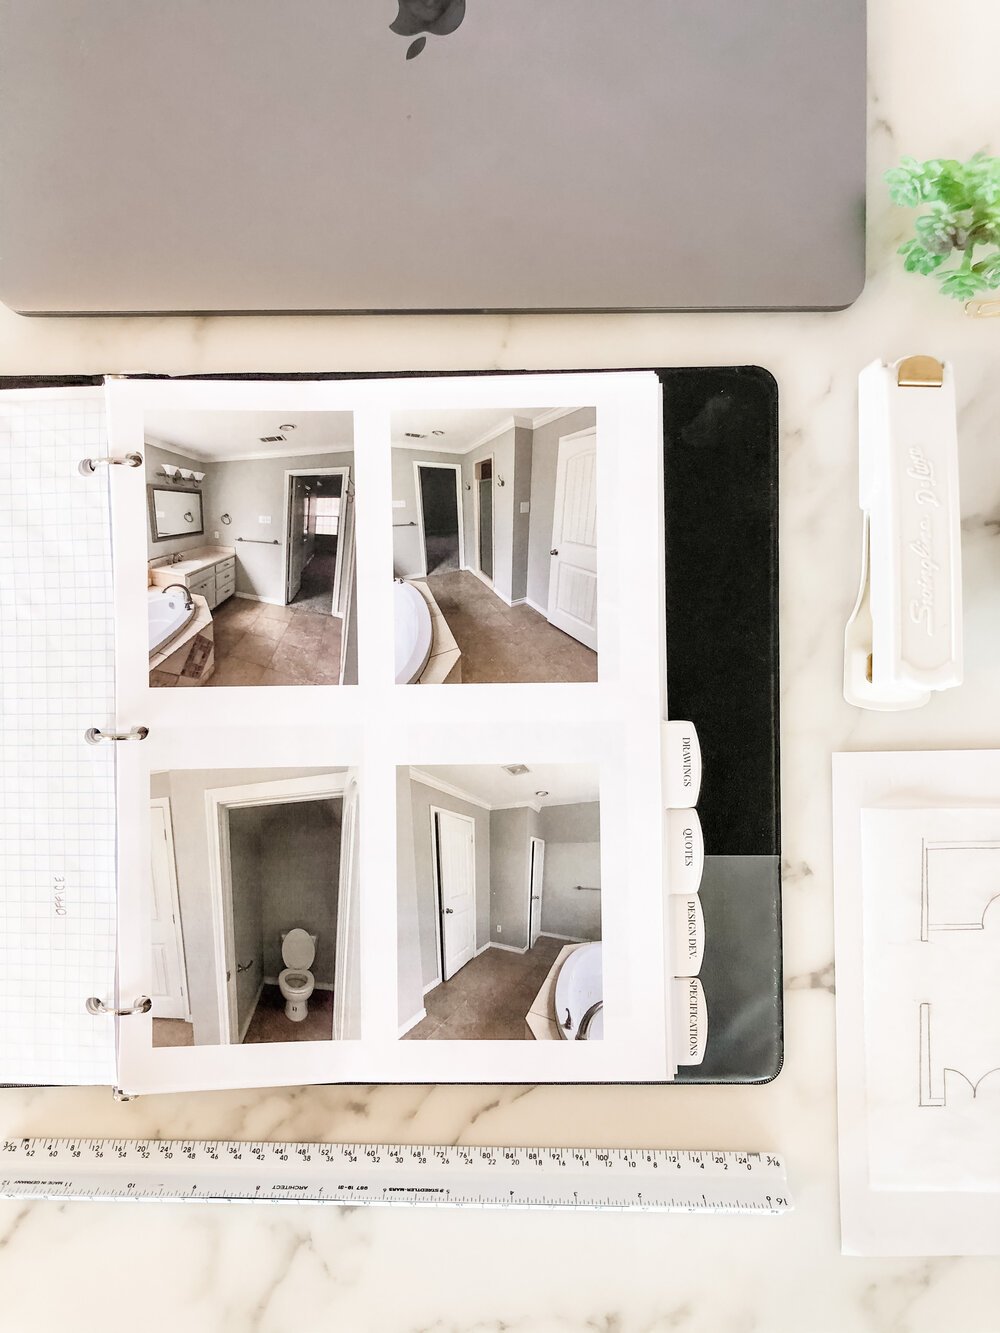
Site Survey - All Site Survey documents are kept here. This includes hand sketches, printed photos of the interior, measurements for window treatments, and client inventory worksheets. You can download these documents here.
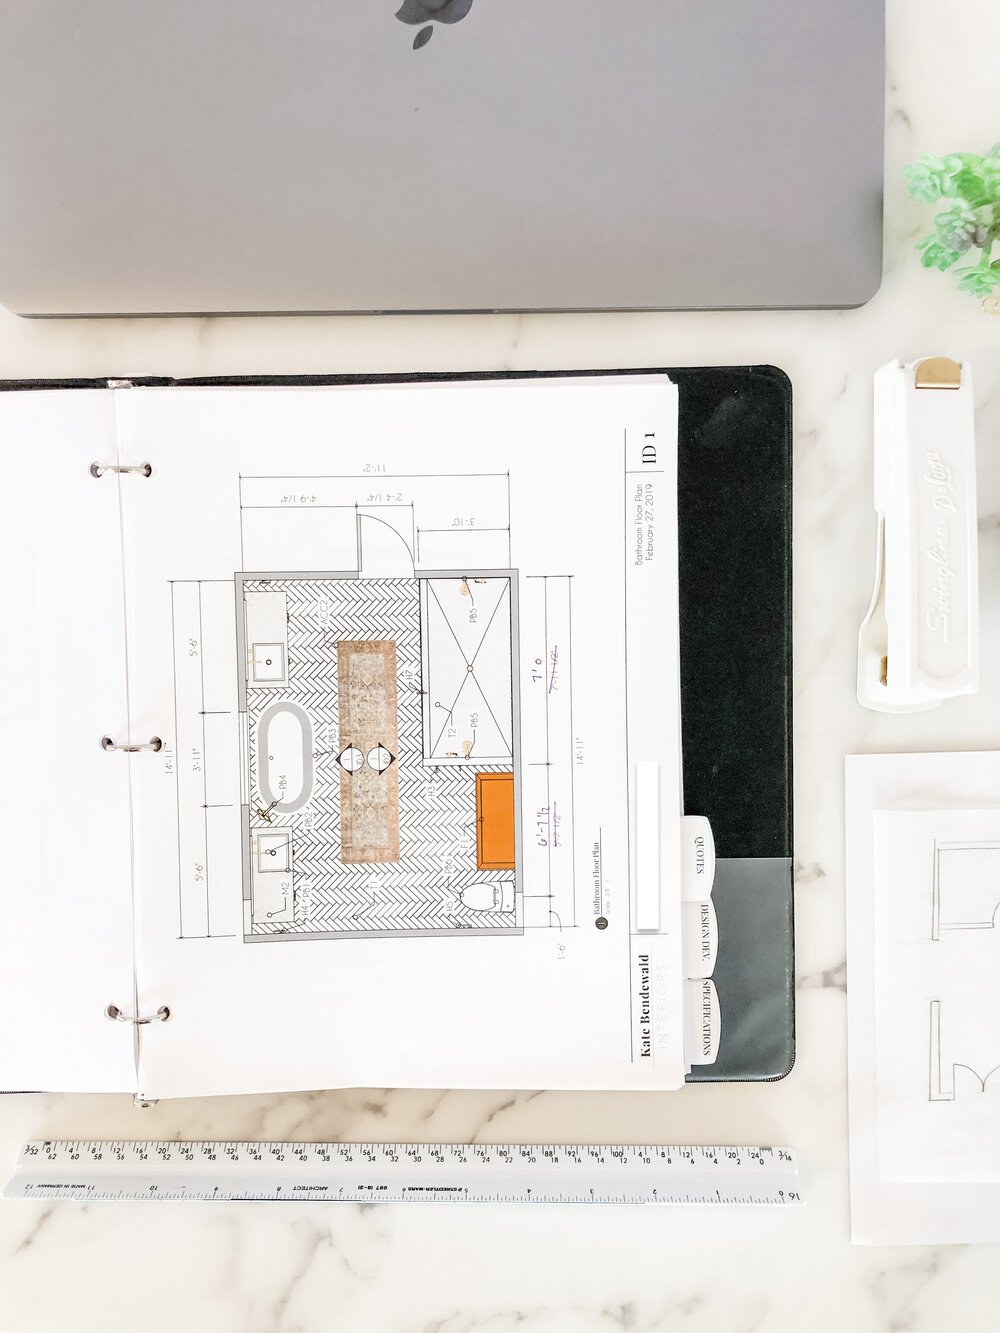
Drawings - Once digital drawings are created, a printed version is stored here. Obviously, large format blueprints are not kept here, but we will usually print 8x11 sized versions for quick reference. This will include drawings from throughout the project including concept design and design development. Plans, elevations, detail drawings, and reflected ceiling plans are all kept here.
Quotes - Whenever we receive a quote for labor or custom work we keep a printed version here. This includes contractor proposals, custom upholstery, wallpaper quotes, etc.

Design Development - Once we have put together concept design pages & design boards, we keep printed versions here. If they are printed on 11 x 17 tabloid-sized sheets which we fold to the inside to accommodate the folder.

Specifications - This tab keeps specifications that we create using our design project management software. (We use Ivy, but you may use something like Gather, My Doma Studio, or similar). We do not keep manufacturer spec’s here because it would - once again - make the binder too cumbersome. We do however keep those digitally. For custom upholstery specifications, we will staple a small fabric sample to the spec sheet for reference.


I hope that you found this reference guide useful. Maintaining a well-organized binder does take a little effort up front, but the result throughout the project is you will be more efficient and always have what you need when you need it.
Let me know in the comments below if you found this helpful or if you have a different way of doing things that you’d like to share.
And don’t forget to download your binder templates below. 👇

Get your Binder Tab Templates
Ready-made Binder Tab Template + Client Cover Page