7 Ways to Organize your Interior Design Business
The new year always brings about the desire to kick things off with a fresh start. Taking time to get the inside of your interior design business organized may take a little time, but it has huge benefits you can experience for the whole year ahead. The reality is, you can work on these any time of year.
I’ve written a lot about organization over the years so today, you’ll find some of those posts linked for more information.
If you are one of those people who says “I’m just not an organized person”, stick with me. You CAN do these things and I’ve tried to create simple systems that work with you and not against you.
A personal story about why organization is so important to me. I have ADD and have taken medication to manage it for years. But when I became pregnant and was nursing, I couldn’t take the medication I’d relied on since 7th grade. All of a sudden, I found myself panicking.
While I do consider myself a rather organized person, at this point, it became critical so I wouldn’t lose my job. It was during this time, that I started to develop systems to keep my physical and digital spaces tidy and implement controls to avoid distractions. The point is, if I can do it, I KNOW you can.
One last thing. Don’t overwhelm yourself and feel like you have to do ALL the things on this list. Pick 2 or 3 sanity-saving measures and just focus on those. Set a timer and get done what you can in that time. Done is better than perfect. Let’s dive in!
TIP #1 - ORGANIZE YOUR DIGITAL FILES
It’s easy to let your digital files become unorganized, but that can lead to critical (or even costly) mistakes and unnecessary brain drain.
First, commit to your file storage programs such as Google Drive or Dropbox, and stick with it. Having files live in both places creates unnecessary confusion about where to find what.
Pro Tip! If you’re a Google Drive person, you can download Google Drive for your Desktop which allows you to drag and drop items in your Finder versus having to open a Google Drive folder to navigate to where you want to save things. This has been a huge time saver for us!
Organize your Business & Client Folders. In this post, I share with you EXACTLY how my folder structures work for both. How to Organize Your Digital Files for your Interior Design Business
TIP #2 - ORGANIZE YOUR INBOX
If you are a Gmail user, there are many simple yet powerful tools to optimize your inbox. Here are a few of my personal favorites:
Automatic Labels - Labels make searching for emails so much easier. You can create a filter so that any email with certain criteria you set will automatically get that label. This makes it easy to find emails You can also create a group of labels related to one another. There are a few labels we recommend: Clients Names, (Group) Purchasing: Order Confirmation, Order Shipped, Order Delivered. I also manually apply labels like “Needs Reply” whenever I’m scanning my email but can’t reply at the moment. Tutorial: How to use labels in Gmail
Email Templates - When you find yourself sending the same information over and over again (i.e. End of Week Emails to clients, etc.) use email templates to save you time. I shared how to do this in this blog post. 3 Productivity Tools I Can’t Live Without in My Interior Design Business
Boomerang for Gmail - Boomerang has several features I can’t live without.
#1 Send messages at a scheduled time. This is excellent for example when you don’t want to email a client on the weekend or at night.
#2 Request an email to return to you. Perfect if you want to follow up with a client or any conversation at a later date.
#3 Remind yourself if no reply. Pretty self-explanatory, but the best part is you schedule the reminder when you’re sending the email. If they reply then the reminder is dismissed.
#4 - Meeting Scheduler - Send someone meeting times that work for you. When they make a selection, it automatically creates a calendar event with Zoom info if you want. Get Boomerang for Gmail
More Gmail Add-ons - Gmail offers a host of integrations in their Marketplace. Zoom, Asana, and Dropbox are a few of my favorites.
TIP #3 - ORGANIZE YOUR CALENDAR
Having a pretty and organized calendar is my version of zen. When you have the right calendars set up and color-coded, you can reduce the mental load by keeping up with only the most important things.
Sub Calendars: Here are the Calendars I have set up with work and life:
Business - Client & Internal meetings - Assistant has full access. Reminders: 1 hour and 15 minutes prior.
Family - All things family-related. Internal, shared with my husband. Also shared with my assistant who can see Free/Busy so she knows my availability without the details.
Personal - Hair appointments, Personal Training, Etc. - Assistant can see Free/busy without details Reminders: 1 hour and 15 minutes prior.
Money - Add reoccurring payment dates and amounts so you never get hit with a surprise bill. Both monthly and annual payments are added. Reminders: 7 days and 3 days prior.
Project Management - Any work happening at a client’s home gets added here (i.e. wallpaper installation, painters, etc.) I don’t necessarily need to be on-site, but I want to be aware of what is happening when.
Birthdays & Anniversaries - Birthdays for friends, family, and clients are included here. Reminders 1 week and 3 days before and reoccur every year. For client birthdays I set recurring reminders for 3 years.
Staff - Employees add time scheduled off here.
Education/Training - Anytime I sign up for a course or a workshop, that gets added here.
Custom Colors - It’s got to be pretty right?! You are no longer bound to Google’s standard colors. You can easily customize the color of each calendar to match your brand or simply to be easy on the eyes. How to Customize your Calendar Colors
TIP #4 - ORGANIZE YOUR OFFICE
Personally, I have a slight fetish with office supplies. Think about things like, where you will keep papers you need at the ready (i.e. Client Intake Cheat Sheet) and how you will keep client information organized using binders and trays. How will you visually display things you are currently working on?
Want more ideas?
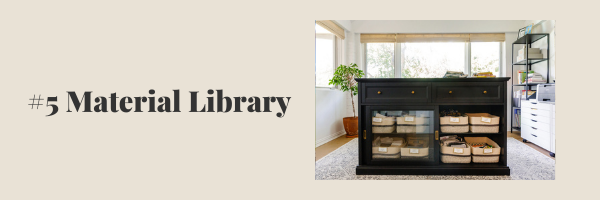
TIP #5 - ORGANIZE YOUR MATERIALS LIBRARY
As interior designers, our office and studio space have more “stuff” than the average office. For years I struggled with the best way to organize materials. Do you organize fabrics by color? Brand? (hint…it’s both!) And what about tile? Shape, size, color, price?
I’ve shared how we do it plus my “Golden Rule” of How to Organize Your Materials Library
TIP #6 - ORGANIZE YOUR OPERATIONS
I love a good system. Even though I’m a tech girl through and through, we utilize a 3-Binder System. It helps us stay super organized and efficient. Here’s how it works:
#1 Business Binder - Organizes all of the business-related documents that we need to reference daily or weekly.
#2 Client Binder - Organizes all of the information that I might want to have with me at a Consultation or Initial Client Meeting.
#3 Design Binder - Organizes all of the design-related quick reference cheat sheets.
(These are different from a “Project Binders”)
You can read all the details of what’s included in each set of binders here: The 3 Binder System - How I Organize My Business to be More Efficient and Profitable
TIP #7 - ORGANIZE YOUR DESIGN PROCESS
If you do ONE thing from this list, let it be this. When you create and run an organized design process, you will be more profitable. Period.
Over the years I’ve shared a number of the ways we organize projects from the very beginning. This way we ALWAYS know what’s next and where to find project-related information. Here are a few resources to get you started:
Onboarding Your Clients: How to Enhance Your Client Experience from Intake Form to Project Kickoff
The Design Process: An Inside Look at the Interior Design Process from Kickoff to Implementation
Try Dubsado and get 20% off the first month or year
Hey, look at you reading all the way to this point! Yes, it’s a ton of information. Remember, you don’t have to do everything here. Instead, pick the 2-3 things that would make the biggest difference in your day-to-day work and life and focus on that.


