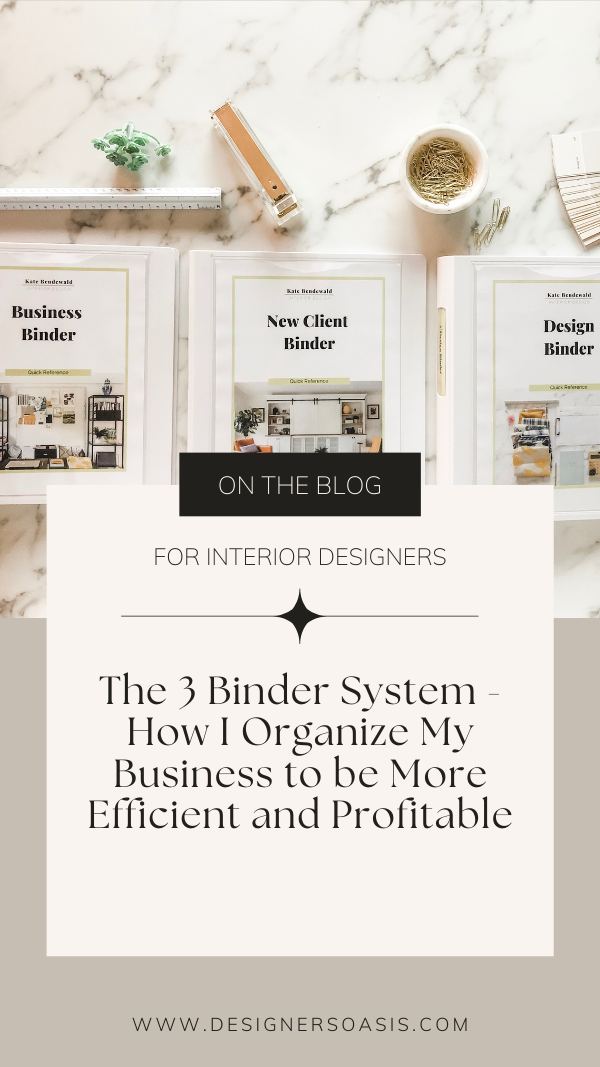
The 3 Binder System - How I Organize My Interior Design Business to be More Efficient
FREEBIE INCLUDED!
Interior design businesses rely on a number of systems to stay organized and efficient such as project management, file organization, and CRM tools. In addition to these must-have tools, I want to go a little old school on you and introduce the #1 simple, reliable, and non-tech tool that I use to run my business. Since you’re an interior designer, I’m going to bet you are comfortable with the material world and will consider the value of this non-technical, physical solution that I think every serious interior design studio needs.
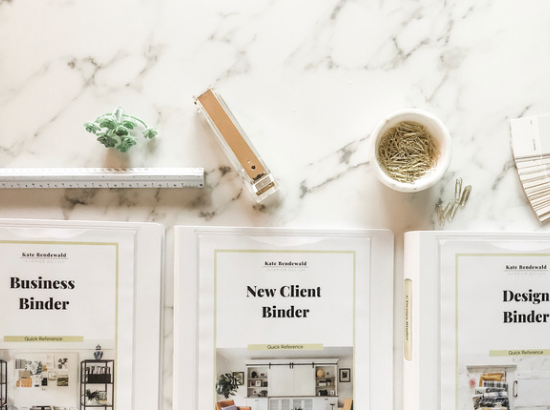
We use 3 quick-reference binders to organize and access information we need at-the-ready on a regular basis. Having these binders set up and accessible in your studio can help make running your business more efficient and more profitable.
At the end of this post, I am going to give you a free Binder Toolkit to get you started, which includes: my Table of Contents Checklist, Binder Cover Pages, and Binder Tabs, all customizable for your business. And if you stick around Designer’s Oasis, you’ll find new resources you can add to your binder coming out on a regular basis.
WATCH THE VIDEO VERSION
WHY IS THIS IMPORTANT?
Before I dive in here, I want to be clear. I DO use technology. In fact, I LOVE technology. Heck, I even minored in technology. I am a digital girl at heart, but the power of having this system integrated into my 6-figure business helps us stay organized, efficient, and demonstrates our professionalism to our clients.
I know what you’re thinking, “Kate - isn’t all of this stuff already stored in Dropbox or Google Drive”? The answer is yes.
But here is why I believe it’s important to have printed versions quickly accessible.
#1 - It’s efficient - Reducing distractions is key to running a profitable business. Being able to keep the thing you are working on at the center of your screen while you open a binder to reference commonly needed information can help reduce distractions and increase your efficiency. Furthermore, anytime I have a new staff person or intern, the most important information they will ever need is all housed here.
#2 - It’s easy - Our brains tend to more easily remember where things are in the physical sense than on the digital screen. If you need scientific evidence, read this study. Also, the portability of the Client binder, specifically, makes presenting information at a consultation easy for clients to understand.
#3 - It’s Professional - The first time your soon-to-be-full-service-client sees you open the Client Binder and they see how organized, thoughtful, and methodical you are, they are going to know they’ve made the right decision to hire you. It helps you build trust so you can more quickly get to YES.
If you’re still on the fence for whatever reason, I’ll ask you to stick with me and read to the end and simply open yourself up to the idea. I think this will all be crystal clear, and you’ll be hoppin’ on online to order your perfect binders in just a few minutes.
Are you ready? Let’s dive in.

THE 3-BINDER SYSTEM
I use a set of 3 binders to organize my business. They are:
#1 Business Binder
#2 Client Binder
#3 Design Binder
Learn more about the “Project Binder” here
Let’s start with a quick overview of the purpose of each binder.
#1 Business Binder - This binder organizes all of the business-related documents that we need to reference daily or weekly.
#2 Client Binder - This binder organizes all of the information that I might want to have with me at a Consultation or Initial Client Meeting.
#3 Design Binder - This binder organizes all of the information we need to quickly access during the design phase.
WHAT I USE
Binder - My personal favorite is the Office Depot Brand EverBind™ D-Ring View Binder, 1". They are a little more expensive than your average binder but the cheap binders we used to use would look trashed after just a few months. I like the customizable spine, the ability to add a nice cover page, the inside pockets, easy-to-open rings, and above all, the super-durable cover.
Tabs - I love the Avery® Big Tab™ Printable Label Dividers, Easy Peel®, Set Of 8-Tabs. These are great because I can print the tab labels with descriptions of what is behind each tab.
Paper - Hammermill Paper, Premium Color Copy Paper 8.5 x 11 Paper, Letter Size, 28lb Paper, 100 Bright - I use high-quality paper for these binders (and client prints). It gives it a more substantial feel.
This post is going to outline exactly how I set up my binders including how I label my tabs and what types of references are behind each. However, you may find that something different works better for you. Great! Don’t feel like you need to follow this to a T. Use it as a starting point and a guide. You are in charge of your business! Also, keep in mind, I’m always adding to these binders!
BUSINESS BINDER
The Business Binder houses all the documents related to the business side of things. There is nothing in the binder that a staff person can’t see. It’s organized by the various aspects of running a business, such as money, legal info, and company standards and procedures. My staff uses this binder all the time.
Inside Cover - Quick Reference Sheet: Includes information like my business name, address, contact info for staff, EIN #, Resale License #, Receiver’s Name and contact information. Lisa, my Project Manager references this all the time to set up new Trade Accounts.
Tabs:
Admin - Pre-Consultation Checklist, Weekly Schedule, Project Calendar, Office Etiquette and Policies, Office supplies and paper (I have favorites I want to be ordered every time), Overview of the Tools we use.
Communications - Brand Guide, my Business in Words, Ideal Client Profile, Phone Scripts, FAQs
Accounting - Accounting Map (I use Profit Fist, so this helps staff know what credit card to use for what type of purchases), Credit Card information, Sales License, and EIN License.
Legal - Copy of my various Client Agreements, Copy of insurance policy
Services - Detailed outline of our services including rates, timeframes, what is/is not included, Comparison Chart, Estimate of Hours, Receiving Price Sheet
Social Media - Social Media posting schedule, Posting heatmap, blog post checklist, Social media posting prompts, Email Checklist
SOPs - Quick Reference Standard Operating Practices (SOP’s)
Unused at this time :)
CLIENT BINDER
This binder organizes all the information about our different services, examples of deliverables, and documents to help close the deal. It goes with us to our initial paid consultations, and the client is thinking about full-service design. Having visual references to share with potential full-service clients helps them more quickly understand the design process and what it looks like to work with us.
Inside Cover - Current Project Calendar in Gantt Chart format - This helps us talk about when we would be available to start their project.
Tabs:
Services - Copies of the Design Services & Pricing Overview, Graphic outline of the Design Process,
Examples - Examples of Deliverables such as mood boards, drawings, and cut sheets,
Portfolio - High-quality prints of projects before and after. Examples of process.
Budgeting - Tools to help drive the budgeting conversation: Furnishings Price List good, better, best, Fill-in-the-blank list, Kitchen Budget Guide
Proposal Templates - Fill-in-the-blank Proposals (For smaller projects)
Legal - Fill-in-the-blank Contracts; Hourly and Hybrid,
Freebies - Copies of Freebie leave-behinds: My favorite paint colors list, Recommended paint products, How to Interview and Hire a Contractor, Kitchen Budget Breakdown, etc. These are especially helpful if the project is not a good fit by adding value to the consultation.
DESIGN BINDER
The Design Binder is a quick reference guide to the information we look up over and over again. Once a project is in the works, this is the binder that organizes design standards and pricing info.
Inside Cover - Conversions: Inches to Feet & Inches, Square Feet to Square Yards, Price per Tile to Price Per Feet
Tabs:
Space Planning - Quick Reference for Furnishings (Get your free copy here), Quick Reference for Kitchen/Bath, Infographics
Kitchen & Bath Standards - Standard Sizes, Appliances, Favorite Plumbing Suites
Materials - Details on Stone, Wood, Fabric, Leather,
Price Guides - Pricing for drapery, pillows, upholstery, etc.
Drawings - Examples of how drawings should look and what information to include, such as legal disclaimers.
Care & Maintenance - Upholstery cleaning guides, plant care, Leather
Design Details - InfoGraphics that show things like: drapery pleat styles, edge profiles for countertops, pillow combinations, sofa styles, tile patterns,
I genuinely hope that you have found this post to be helpful for you in your business. I can’t emphasize enough the value of having quick reference guides that are thorough and organized. Being efficient is key to being profitable, and having standards also greatly reduces costly mistakes, errors, and oversights.
A few final thoughts.
Make these your own. They should reflect your business, and they will look different than mine in many ways. Below you can download the exact covers, tabs, and an example table of contents that I use.
Stick Around - Over time, I’ll create and share new tools you can add to your binder, but I encourage you to customize the contents to suit your needs. My binders have been added to over many years.
Don’t get bogged down with trying to create every little thing for each binder. Just start with making the binders themselves, so you have a home for the tools and resources you create as you go. I’m sure you already have some things that you can start with.
If you want a quick jumpstart, download the free printables below, where you’ll get instant access to the following:
Table of Contents Checklist
Binder Cover Pages
Binder Tabs
all customizable for your business.
Download your Free Binder Toolkit!
All are completely customizable for your business!